
I got a couple of Raspberry Pis lying around at home and thought, what better use for one of them than to run my WordPress blog (another one than this one, but this one may soon follow). The trick to it, however, is that I do not have a static IP address from my internet provider, nor do I want to allow folks into my private network anyway. Luckily, I do have a small cloud-based VM on the public internet, too small probably to run WordPress and MySQL themselves but good enough to redirect some traffic. So, I thought, how about a reverse proxy on the cloud-based server just forwarding HTTP requests via an SSH tunnel to the Raspberry Pi? That way, I can have the Raspberry Pi establish the connection to the cloud-based server, meaning that the connection will be out of my private network and not into it, and it is all secured via SSH. The setup for such a reverse proxy and SSH tunnel is not complicated but requires a few steps that are not easy to find on the web. So, below I decided to document my pilot.
Table of Contents
- Table of Contents
- Setup
- Next steps
- Conclusion
Setup
Cloud-based server
Create a UNIX user for SSH tunneling
My cloud-based server is an Ubuntu server on the Oracle Cloud Always Free Tier. The first step is to create a user that will be used for the SSH traffic forwarding, a user the Raspberry Pi can log in with. It’s best practice to have a throwaway UNIX user rather than using your actual user, you know, security, and so forth. Creating that user is straightforward:
$ sudo useradd <your_username> -b /home -m -s /bin/bash
Generate SSH key pair to log into the cloud-based server
For the Raspberry Pi to be able to log into the cloud-based server without the need for a password, an SSH key public/private key pair is needed. That can also be easily generated:
$ sudo su - <you_ username>
$ ssh-keygen
Generating public/private rsa key pair.
Enter file in which to save the key (/home/<you_ username>/.ssh/id_rsa): /home/<you_ username>/.ssh/<your_key_name>
Enter passphrase (empty for no passphrase):
Enter same passphrase again:
Your identification has been saved in /home/<you_ username>/.ssh/<your_key_name>
Your public key has been saved in /home/<you_ username>/.ssh/<your_key_name>.pub
The key fingerprint is:
**********************************************************
The key's randomart image is:
+---[RSA 3072]----+
|****             |
|*****            |
|*****            |
|********         |
|*********        |
|******          |
| *******         |
|  *****          |
|                 |
+----[SHA256]-----+
Add the public key to authorzied_keys
The next step is to a) add the public key inside the above-generated *.pub file into the $HOME/.ssh/authorized_keys file and b) transfer the private key to your Raspberry Pi (you will need that later). Because the UNIX user is brand new, the $HOME/.ssh folder did not exist before the key generation, hence there was also no $HOME/.ssh/authorized_keys file. So, the easiest to add the public key to the authorized_keys file is to simply rename the *.pub file to authorized_keys. Note: if you do already have an authorized_keys file, do not overwrite it but instead append the content of the *.pub file at the end of the authorized_keys file.
$ cd $HOME/.ssh/
$ mv <your_key_name>.pub authorized_keys
Once you have done that, your cloud-based server is ready to accept connections with the newly created user authorized via the private key. SFTP the private key onto your Raspberry Pi. After that, you can and probably should delete the private key from your cloud-based server. All you need on the cloud-based server to ssh into it is the $HOME/.ssh/authorized_keys file containing the public key.
Note: never, ever share your private key with anybody! If the private key gets compromised, regenerate a new SSH key pair immediately. Optionally, create a new throwaway UNIX user altogether first.
Before we move on to the Raspberry Pi, let’s continue with the Reverse Proxy setup.
Allow HTTP & HTTPS traffic
For people to be able to browse the Blog, the ports for HTTP and HTTPS, 80 and 443 respectively, need to be accessible to the outside world. Depending on your setup, you may need to open the ports in your cloud-based server’s firewall (and your Cloud Console network settings). My cloud-based server uses IPTABLES to control network traffic which blocks these ports by default. The following commands will add rules to the firewall to allow incoming connections on ports 80 and 443 and persist these rules for subsequent reboots of the machine:
$ sudo iptables -I INPUT 6 -m state --state NEW -p tcp --dport 80 -j ACCEPT
$ sudo iptables -I INPUT 6 -m state --state NEW -p tcp --dport 443 -j ACCEPT
$ sudo netfilter-persistent save
For servers using firewalld use the following commands:
$ firewall-cmd --zone=public --permanent --add-service=http
$ firewall-cmd --zone=public --permanent --add-service=https
$ firewall-cmd --reload
Setup NGINX as a reverse proxy
Once your cloud-based server allows connections to the respective HTTP ports, it’s time to set up the reverse proxy that will send the incoming requests via the SSH tunnel to the Raspberry Pi (we will cover the Raspberry Pi part at the end). In my case, I will be using NGINX as the reverse proxy, but technically speaking, you should be able to use any HTTP(S) capable reverse proxy to forward the traffic.
Why is the proxy needed?
You may have this question if you are not intimately familiar with the topic, and don’t worry, I too, had to sit back and think about it for a second. 🙂 Ports below 1024 are privileged ports on which regular UNIX users cannot bind and run processes. So, you cannot simply forward port 80 or 443 via SSH to a normal user, you would have to do that as root or another privileged user, and that, of course, is very much not recommended for security reasons. So, instead, you can use a reverse proxy running as a privileged user that listens on these privileged ports 80 and 443 and forwards traffic to (a) non-privileged port(s). Doing so allows you to then connect to the cloud-based server with a regular (throwaway, remember?) user instead of root or another privileged user.
Install NGINX
If not already available on your cloud-based server by default, the next step is to install NGINX, which is usually just a simple command like sudo apt install -y nginx:
$ sudo apt install nginx
Reading package lists... Done
Building dependency tree... Done
Reading state information... Done
The following additional packages will be installed:
  fontconfig-config fonts-dejavu-core libdeflate0 libfontconfig1 libgd3 libjbig0 libjpeg-turbo8 libjpeg8 libnginx-mod-http-geoip2 libnginx-mod-http-image-filter
  libnginx-mod-http-xslt-filter libnginx-mod-mail libnginx-mod-stream libnginx-mod-stream-geoip2 libtiff5 libwebp7 libxpm4 nginx-common nginx-core
Suggested packages:
  libgd-tools fcgiwrap nginx-doc ssl-cert
The following NEW packages will be installed:
  fontconfig-config fonts-dejavu-core libdeflate0 libfontconfig1 libgd3 libjbig0 libjpeg-turbo8 libjpeg8 libnginx-mod-http-geoip2 libnginx-mod-http-image-filter
  libnginx-mod-http-xslt-filter libnginx-mod-mail libnginx-mod-stream libnginx-mod-stream-geoip2 libtiff5 libwebp7 libxpm4 nginx nginx-common nginx-core
Selecting previously unselected package libnginx-mod-stream-geoip2.
Preparing to unpack .../17-libnginx-mod-stream-geoip2_1.18.0-6ubuntu14.3_amd64.deb ...
Unpacking libnginx-mod-stream-geoip2 (1.18.0-6ubuntu14.3) ...
Selecting previously unselected package nginx-core.
Preparing to unpack .../18-nginx-core_1.18.0-6ubuntu14.3_amd64.deb ...
Unpacking nginx-core (1.18.0-6ubuntu14.3) ...
Selecting previously unselected package nginx.
Preparing to unpack .../19-nginx_1.18.0-6ubuntu14.3_amd64.deb ...
Unpacking nginx (1.18.0-6ubuntu14.3) ...
Setting up libxpm4:amd64 (1:3.5.12-1build2) ...
Setting up libdeflate0:amd64 (1.10-2) ...
Setting up nginx-common (1.18.0-6ubuntu14.3) ...
Setting up libjbig0:amd64 (2.1-3.1ubuntu0.22.04.1) ...
Setting up libnginx-mod-http-xslt-filter (1.18.0-6ubuntu14.3) ...
Setting up fonts-dejavu-core (2.37-2build1) ...
Setting up libjpeg-turbo8:amd64 (2.1.2-0ubuntu1) ...
Setting up libwebp7:amd64 (1.2.2-2) ...
Setting up libnginx-mod-http-geoip2 (1.18.0-6ubuntu14.3) ...
Setting up libjpeg8:amd64 (8c-2ubuntu10) ...
Setting up libnginx-mod-mail (1.18.0-6ubuntu14.3) ...
Setting up fontconfig-config (2.13.1-4.2ubuntu5) ...
Setting up libnginx-mod-stream (1.18.0-6ubuntu14.3) ...
Setting up libtiff5:amd64 (4.3.0-6ubuntu0.3) ...
Setting up libfontconfig1:amd64 (2.13.1-4.2ubuntu5) ...
Setting up libnginx-mod-stream-geoip2 (1.18.0-6ubuntu14.3) ...
Setting up libgd3:amd64 (2.3.0-2ubuntu2) ...
Setting up libnginx-mod-http-image-filter (1.18.0-6ubuntu14.3) ...
Setting up nginx-core (1.18.0-6ubuntu14.3) ...
 * Upgrading binary nginx                                                                                                                                         [ OK ]
Setting up nginx (1.18.0-6ubuntu14.3) ...
Processing triggers for ufw (0.36.1-4build1) ...
Processing triggers for man-db (2.10.2-1) ...
Processing triggers for libc-bin (2.35-0ubuntu3.1) ...
Scanning processes...
Scanning linux images...

Running kernel seems to be up-to-date.

No services need to be restarted.

No containers need to be restarted.

No user sessions are running outdated binaries.

No VM guests are running outdated hypervisor (qemu) binaries on this host.
$
After that is done, you should be able to see the NGINX landing page when typing in your cloud-based server’s IP address in a browser:
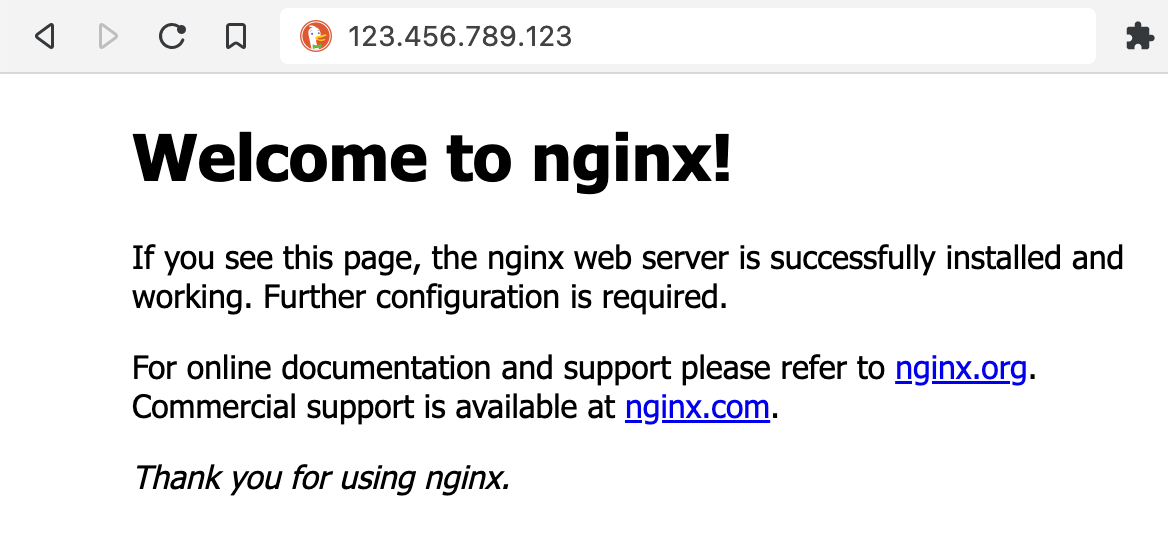
If you do not see this page, something went wrong during either the NGINX installation or the opening of the firewall ports. You will have to resolve that issue first before continuing!
Configure NGINX as a reverse proxy
Once NGINX is running, it’s time to set it up as a reverse proxy to forward HTTP requests to the SSH tunnel. The one thing you have to decide now is which port you will be using for the SSH tunnel. This can be any port from 1024 up, as long as it is unused. You will commonly see ports like 8080 or others being used for such scenarios. In my case, I’m going to go for 9999.
Add a virtual host to your NGINX configuration that will reverse proxy HTTP requests arriving at port 80 to port 9999 by adding a new file proxy to /etc/nginx/sites-available including the following content:
server {
  listen 80;
  location / {
    proxy_set_header Host $http_host;
    proxy_set_header X-Real-IP $remote_addr;
    proxy_set_header X-Forwarded-For $proxy_add_x_forwarded_for;
    proxy_pass http://127.0.0.1:9999;
  }
}
The above instructions tell NGINX to listen on port 80 and forward the traffic to the local port 9999 (via the proxy_pass http://127.0.0.1:9999; instruction). If you want to enable your reverse proxy for HTTPS traffic, you can do so relatively quickly and easily, thanks to Let’s Encrypt. Check out my other blog post on that topic: Setup free Let’s Encrypt SSL/TLS Certificates for NGINX Reverse Proxies
Last, activate your virtual server by linking the new file proxy into /etc/nginx/sites-enabled, deactivate the default configuration by removing the link for default and tell NGINX to reload the configuration:
$ sudo ln -s /etc/nginx/sites-available/proxy /etc/nginx/sites-enabled/
$ sudo rm /etc/nginx/sites-enabled/default
$ sudo nginx -s reload
You are now all set on your cloud-based server. Time to go back to your Raspberry Pi.
Raspberry Pi
Install the private key for your Raspberry Pi user
Just like your cloud-based server, it’s best to create a throwaway UNIX user on the Raspberry Pi as well. The steps are practically the same as before. First, create a user, then create the .ssh folder and store the private key from the cloud-based server in it:
$ sudo useradd <your_username> -b /home -m -s /bin/bash
$ sudo su - <your_username>
$ mkdir .ssh
Remember the private key file that you saved earlier? Now it’s time to use it. Put the private key file into the $HOME/.ssh folder of the newly created user on your Raspberry Pi.
Once you have the private key in place, go ahead and SSH into the cloud-based server by pointing to the private key file via the -i option. You should be seeing something similar to this (answer the question with yes, you only have to do that the first time):
ssh <your_username>@<your_cloud-based_server> -i $HOME/.ssh/<your_private_key>
The authenticity of host '******* (*******)' can't be established.
ECDSA key fingerprint is ***********************************.
Are you sure you want to continue connecting (yes/no/[fingerprint])? yes
Warning: Permanently added '************' (ECDSA) to the list of known hosts.
Welcome to Ubuntu 22.04.1 LTS (GNU/Linux 5.15.0-1021-oracle x86_64)
<your_username>@<your_cloud-based_server>:~$
If you cannot reach your cloud-based server, recheck your setup and see what went wrong. Once you can connect, you are almost done.
Exit the SSH test connection, you won’t need it anymore. All that is left to do is to establish the SSH tunnel from your Raspberry Pi to your cloud-based server via this command:
$ ssh -f -N -T -R 9999:localhost:80 <your_username>@<your_cloud-based_server> -i $HOME/.ssh/<your_private_key>
The -f option tells SSH to run in the background, the -N option not to execute any remote command and the -R option to forward the remote port of 9999 to localhost:80.
Once the command has been executed, you can reach your WordPress site via your cloud-based server IP address, all that’s left to do is to point your domain name to that cloud-based server IP address.
Next steps
Once you can reach your website on your Raspberry Pi from your cloud-based server, there are some additional steps you may want to take:
- Secure your domain access to the reverse proxy via HTTPS. This means the reverse proxy configuration will also start listening on port
443and forward requests on that port to the Raspberry Pi. Check out Setup free Let’s Encrypt SSL/TLS Certificates for NGINX Reverse Proxies for a quick and easy setup. - Install a Linux service for establishing the SSH tunnel, therefore not manually having to execute the
sshcommand after a restart of the Raspberry Pi or network failure. If you do so, do not use the-foption anymore, you will wantsshto run in the foreground as the service. - Regularly recycle your public/private keys and potentially the throwaway UNIX users.
Conclusion
Using SSH tunnels and reverse proxies is a nice way to expose something from your private network to the public internet without running the risk of exposing your entire private network. The setup requires quite a few steps but is not very difficult overall. And there is no need to pay for a service accomplishing the same if you don’t shy away from some manual Linux administration. 🙂