Oracle has just included Kubernetes support for its VirtualBox Vagrant GitHub repository. With that it’s now easier than ever to get a Kubernetes cluster up and running inside VMs. If you have not come across Vagrant yet, it’s a great tool by HashiCorp for “Development Environments Made Easy“.
tl;dr
- Install VirtualBox
- Install Vagrant
- Clone the GitHub repository git clone https://github.com/oracle/vagrant-boxes
- Change into the
vagrant-boxes/Kubernetesfolder - Run
vagrant up master; vagrant ssh master - Within the master guest, run as
root:/vagrant/scripts/kubeadm-setup-master.sh
You will be asked to log in to the Oracle Container Registry - Run
vagrant up worker1; vagrant ssh worker1 - Within the worker1 guest, run as
root:/vagrant/scripts/kubeadm-setup-worker.sh
You will be asked to log in to the Oracle Container Registry - Repeat the last 2 steps for worker2
Your cluster is ready!
Within the master guest you can check the status of the cluster, as the vagrant user, e.g.:
kubectl cluster-info
kubectl get nodes
kubectl get pods --namespace=kube-system
What you need
In order to get started you just need to perform four things first:
- Install VirtualBox on your machine
- Install Vagrant on your machine
- Create a user on https://container-registry.oracle.com
- Download or clone the VirtualBox Vagrant Github repo
Setup
Installing VirtualBox and Vagrant on your machine, regardless whether it’s a Mac, Windows or Linux, is very straight forward. In my case on Mac it’s just an easy download and a couple of clicks, so I’m not going to cover it here.
The Oracle Container Registry
The provisioning script will pull several Kubernetes Docker images from the Oracle Container Registry, a fully free Docker image repository from Oracle. In order for it to do so, you have to have an Oracle account to sign in with on the container registry and accept the license agreement. This is a quick one-time task to perform as the container registry will remember your license acceptance on subsequent pulls. So, if you have done this already before you can just skip ahead to Creating the Kubernetes cluster on VirtualBox.
Creating an Oracle account for container-registry.oracle.com
The user you need for the container registry is the same that you might already use for OTN or other Oracle websites. If you already have one, skip this step and go to “Accepting the end user license agreement”. Otherwise, creating a user is quick and easy. Just go to https://container-registry.oracle.com and click on “Register” on the top right and click on “Create New Oracle Account”:
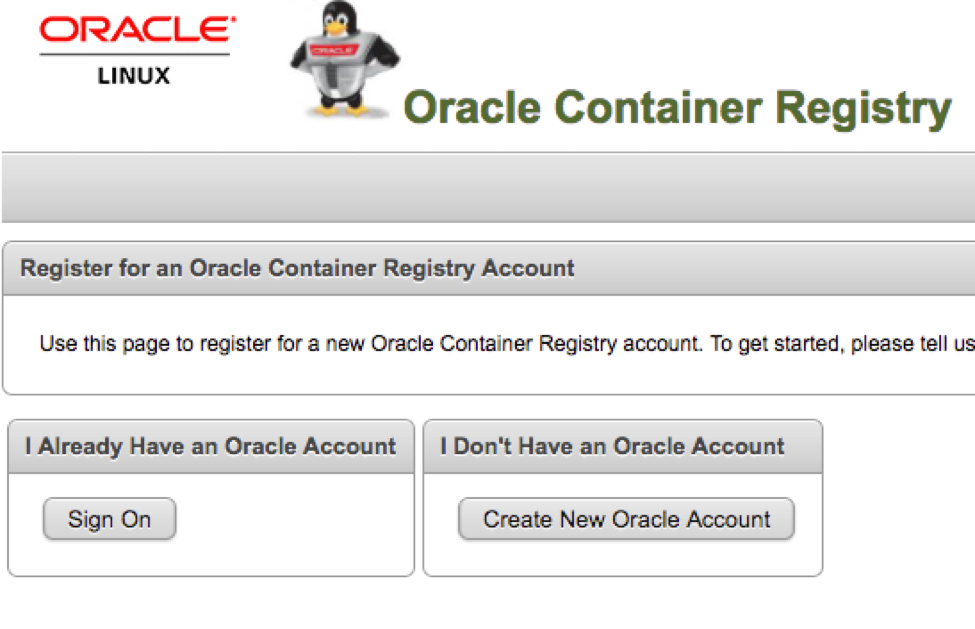
Once you have created the account and are signed in, it’s time to accept the license agreement.
Accepting the end user license agreement
Also this step if easy and straight forward. All the components that are pulled from the registry are under “Container Services”:
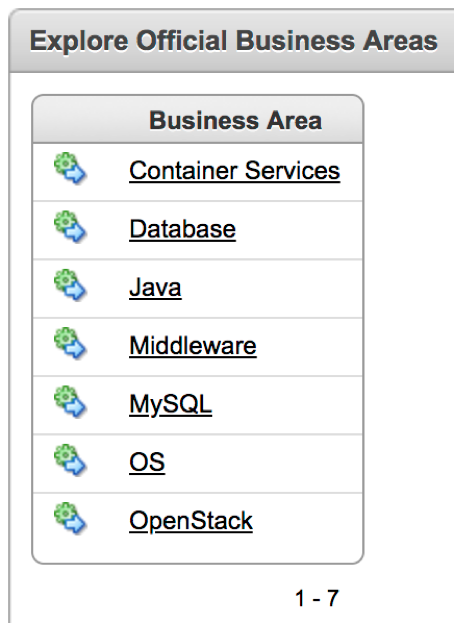
All you have to do is click on “Container Services” and in there it will tell you that “You must agree to and accept the Oracle Standard Terms and Restrictions prior to downloading from the Oracle Container Registry. Please read the license agreement on the following page carefully.”:

Click “Continue”, read through the agreement and click “Accept” at the bottom right, only if you agree to the license terms of course 🙂

And that’s it, now you are ready to build your Kubernetes cluster. Once again, remember that the license acceptance was just a one-time step. You will not have to agree to it anymore going forward, regardless how often you build or rebuild a Kubernetes cluster.
Creating the Kubernetes cluster on VirtualBox
In this example we are going to create a one master, two worker node cluster.
Cloning the GitHub repository
First and foremost, you have to have the Vagrant files on your machine. This can either be done by cloning the GitHub repo via git clone https://github.com/oracle/vagrant-boxes or by downloading the repo via the “Download” button within the browser and extracting it:
$ git clone https://github.com/oracle/vagrant-boxes
Cloning into 'vagrant-boxes'...
remote: Counting objects: 342, done.
remote: Compressing objects: 100% (58/58), done.
remote: Total 342 (delta 42), reused 71 (delta 31), pack-reused 249
Receiving objects: 100% (342/342), 69.52 KiB | 4.63 MiB/s, done.
Resolving deltas: 100% (170/170), done.
Once you have done that just go into the Kubernetes folder:
$ cd vagrant-boxes/Kubernetes/
Creating the Kubernetes master
To create the master simply type vagrant up master. This will provision the VM with the Kubernetes master for you:
$ vagrant up master
Bringing machine 'master' up with 'virtualbox' provider...
==> master: Box 'ol7-latest' could not be found. Attempting to find and install...
master: Box Provider: virtualbox
master: Box Version: >= 0
==> master: Box file was not detected as metadata. Adding it directly...
==> master: Adding box 'ol7-latest' (v0) for provider: virtualbox
master: Downloading: https://yum.oracle.com/boxes/oraclelinux/latest/ol7-latest.box
==> master: Successfully added box 'ol7-latest' (v0) for 'virtualbox'!
==> master: Importing base box 'ol7-latest'...
==> master: Matching MAC address for NAT networking...
==> master: Setting the name of the VM: Kubernetes_master_1521841817878_31194
==> master: Clearing any previously set network interfaces...
==> master: Preparing network interfaces based on configuration...
master: Adapter 1: nat
master: Adapter 2: hostonly
==> master: Forwarding ports...
master: 8001 (guest) => 8001 (host) (adapter 1)
master: 22 (guest) => 2222 (host) (adapter 1)
==> master: Running 'pre-boot' VM customizations...
==> master: Booting VM...
==> master: Waiting for machine to boot. This may take a few minutes...
master: SSH address: 127.0.0.1:2222
master: SSH username: vagrant
master: SSH auth method: private key
master:
master: Vagrant insecure key detected. Vagrant will automatically replace
master: this with a newly generated keypair for better security.
master:
master: Inserting generated public key within guest...
master: Removing insecure key from the guest if it's present...
master: Key inserted! Disconnecting and reconnecting using new SSH key...
==> master: Machine booted and ready!
==> master: Checking for guest additions in VM...
master: The guest additions on this VM do not match the installed version of
master: VirtualBox! In most cases this is fine, but in rare cases it can
master: prevent things such as shared folders from working properly. If you see
master: shared folder errors, please make sure the guest additions within the
master: virtual machine match the version of VirtualBox you have installed on
master: your host and reload your VM.
master:
master: Guest Additions Version: 5.1.24
master: VirtualBox Version: 5.2
==> master: Setting hostname...
==> master: Configuring and enabling network interfaces...
master: SSH address: 127.0.0.1:2222
master: SSH username: vagrant
master: SSH auth method: private key
==> master: Configuring proxy environment variables...
==> master: Mounting shared folders...
master: /vagrant => /Users/gvenzl/Downloads/vagrant-boxes/Kubernetes
==> master: Running provisioner: shell...
master: Running: /var/folders/5m/xnj65v6d4dx8vbkp_7dt_pyw0000gn/T/vagrant-shell20180323-6639-15ftx0.sh
master: Installing and configuring Docker Engine
...
...
...
master: Installed:
master: kubeadm.x86_64 0:1.9.1-2.0.2.el7
master:
master: Dependency Installed:
master: kubectl.x86_64 0:1.9.1-2.0.2.el7
master: kubelet.x86_64 0:1.9.1-2.0.2.el7
master: kubernetes-cni.x86_64 0:0.6.0-2.0.1.el7
master: kubernetes-cni-plugins.x86_64 0:0.6.0-2.0.1.el7
master: socat.x86_64 0:1.7.3.2-2.el7
master: Complete!
master: net.bridge.bridge-nf-call-ip6tables = 1
master: net.bridge.bridge-nf-call-iptables = 1
master: Your Kubernetes VM is ready to use!
==> master: Configuring proxy for Docker...
==> master: Running provisioner: shell...
master: Running: inline script
==> master: Configuring proxy for Docker...
==> master: Running provisioner: shell...
master: Running: inline script
==> master: Configuring proxy for Docker...
$
Once the master VM is up and, ssh into the VM and run, as the root user, /vagrant/scripts/kubeadm-setup-master.sh. This will provision the Kubernetes master note for you. Note that the script will ask you for your username and password for container-registry.oracle.com:
$ vagrant ssh master

Welcome to Oracle Linux Server release 7.4 (GNU/Linux 4.1.12-112.14.13.el7uek.x86_64)

The Oracle Linux End-User License Agreement can be viewed here:

* /usr/share/eula/eula.en_US

For additional packages, updates, documentation and community help, see:

* http://yum.oracle.com/

[vagrant@master ~]$ su -
[root@master ~]# /vagrant/scripts/kubeadm-setup-master.sh
/vagrant/scripts/kubeadm-setup-master.sh: Login to container registry
Username: gerald[dot]venzl[at]oracle[dot]com
Password:
Login Succeeded
/vagrant/scripts/kubeadm-setup-master.sh: Setup Master node
Starting to initialize master node ...
Checking if env is ready ...
Checking whether docker can pull busybox image ...
Checking access to container-registry.oracle.com/kubernetes ...
v1.9.1: Pulling from kubernetes/kube-proxy-amd64
Digest: sha256:852fbdc6be8b357356c047bd9649e1c62f572c0e61a0526cd048c0d0dc675e4d
Status: Image is up to date for container-registry.oracle.com/kubernetes/kube-proxy-amd64:v1.9.1
Checking whether docker can run container ...
Checking iptables default rule ...
Checking br_netfilter module ...
Checking sysctl variables ...
Enabling kubelet ...
Created symlink from /etc/systemd/system/multi-user.target.wants/kubelet.service to /etc/systemd/system/kubelet.service.
Check successful, ready to run 'up' command ...
Waiting for kubeadm to setup master cluster...
Please wait ...
- - 75% completed
Waiting for the control plane to become ready ...
...............
100% completed
clusterrole "flannel" created
clusterrolebinding "flannel" created
serviceaccount "flannel" created
configmap "kube-flannel-cfg" created
daemonset "kube-flannel-ds" created

Installing kubernetes-dashboard ...

Creating self-signed certificates
Generating a 2048 bit RSA private key
..................................................+++
.......................+++
writing new private key to 'dashboard.key'
-----
No value provided for Subject Attribute C, skipped
No value provided for Subject Attribute ST, skipped
No value provided for Subject Attribute L, skipped
No value provided for Subject Attribute O, skipped
No value provided for Subject Attribute OU, skipped
Signature ok
subject=/CN=kubernetes-dashboard
Getting Private key
secret "kubernetes-dashboard-certs" created
serviceaccount "kubernetes-dashboard" created
role "kubernetes-dashboard-minimal" created
rolebinding "kubernetes-dashboard-minimal" created
deployment "kubernetes-dashboard" created
service "kubernetes-dashboard" created
Enabling kubectl-proxy.service ...
Starting kubectl-proxy.service ...

[===> PLEASE DO THE FOLLOWING STEPS BELOW: <===]

Your Kubernetes master has initialized successfully!

To start using your cluster, you need to run the following as a regular user:

mkdir -p $HOME/.kube
sudo cp -i /etc/kubernetes/admin.conf $HOME/.kube/config
sudo chown $(id -u):$(id -g) $HOME/.kube/config

You can now join any number of machines by running the following on each node
as root:

kubeadm-setup.sh join --token ce109c.ae7671a693f813d9 192.168.99.100:6443 --discovery-token-ca-cert-hash sha256:861b4d11c037bae9069c8a22c47391b986ea95cab299534d9d0d7f6657eae4f1

/vagrant/scripts/kubeadm-setup-master.sh: Copying admin.conf for vagrant user
/vagrant/scripts/kubeadm-setup-master.sh: Copying admin.conf into host directory
/vagrant/scripts/kubeadm-setup-master.sh: Saving token for worker nodes
/vagrant/scripts/kubeadm-setup-master.sh: Master node ready, run
/vagrant/scripts/kubeadm-setup-worker.sh
on the worker nodes
[root@master ~]# exit
logout
[vagrant@master ~]$ exit
logout
Connection to 127.0.0.1 closed.
$
Creating the Kubernetes worker nodes
Once the master is up and running you can now provision the worker nodes. This is similarly easy. To provision the first worker node type vagrant up worker1:
$ vagrant up worker1
Bringing machine 'worker1' up with 'virtualbox' provider...
==> worker1: Importing base box 'ol7-latest'...
==> worker1: Matching MAC address for NAT networking...
==> worker1: Setting the name of the VM: Kubernetes_worker1_1521842646941_61070
==> worker1: Fixed port collision for 22 => 2222. Now on port 2200.
==> worker1: Clearing any previously set network interfaces...
==> worker1: Preparing network interfaces based on configuration...
worker1: Adapter 1: nat
worker1: Adapter 2: hostonly
==> worker1: Forwarding ports...
worker1: 22 (guest) => 2200 (host) (adapter 1)
==> worker1: Running 'pre-boot' VM customizations...
==> worker1: Booting VM...
==> worker1: Waiting for machine to boot. This may take a few minutes...
worker1: SSH address: 127.0.0.1:2200
...
...
...
worker1: Installed:
worker1: kubeadm.x86_64 0:1.9.1-2.0.2.el7
worker1:
worker1: Dependency Installed:
worker1: kubectl.x86_64 0:1.9.1-2.0.2.el7
worker1: kubelet.x86_64 0:1.9.1-2.0.2.el7
worker1: kubernetes-cni.x86_64 0:0.6.0-2.0.1.el7
worker1: kubernetes-cni-plugins.x86_64 0:0.6.0-2.0.1.el7
worker1: socat.x86_64 0:1.7.3.2-2.el7
worker1: Complete!
worker1: net.bridge.bridge-nf-call-ip6tables = 1
worker1: net.bridge.bridge-nf-call-iptables = 1
worker1: Your Kubernetes VM is ready to use!
==> worker1: Configuring proxy for Docker...
$
Once the worker1 VM is up and running, again, ssh into the VM and run as root user: /vagrant/scripts/kubeadm-setup-worker.sh. Once again you will be asked to provide the username and password for container-registry.oracle.com:
$ vagrant ssh worker1

Welcome to Oracle Linux Server release 7.4 (GNU/Linux 4.1.12-112.14.13.el7uek.x86_64)

The Oracle Linux End-User License Agreement can be viewed here:

* /usr/share/eula/eula.en_US

For additional packages, updates, documentation and community help, see:

* http://yum.oracle.com/

[vagrant@worker1 ~]$ su -
[root@worker1 ~]# /vagrant/scripts/kubeadm-setup-worker.sh
/vagrant/scripts/kubeadm-setup-worker.sh: Login to container registry
Username: gerald[dot]venzl[at]oracle[dot]com
Password:
Login Succeeded
/vagrant/scripts/kubeadm-setup-worker.sh: Setup Worker node
Starting to initialize worker node ...
Checking if env is ready ...
Checking whether docker can pull busybox image ...
Checking access to container-registry.oracle.com/kubernetes ...
v1.9.1: Pulling from kubernetes/kube-proxy-amd64
Digest: sha256:852fbdc6be8b357356c047bd9649e1c62f572c0e61a0526cd048c0d0dc675e4d
Status: Image is up to date for container-registry.oracle.com/kubernetes/kube-proxy-amd64:v1.9.1
Checking whether docker can run container ...
Checking iptables default rule ...
Checking br_netfilter module ...
Checking sysctl variables ...
Enabling kubelet ...
Created symlink from /etc/systemd/system/multi-user.target.wants/kubelet.service to /etc/systemd/system/kubelet.service.
Check successful, ready to run 'join' command ...
[preflight] Running pre-flight checks.
[validation] WARNING: kubeadm doesn't fully support multiple API Servers yet
[discovery] Trying to connect to API Server "192.168.99.100:6443"
[discovery] Trying to connect to API Server "192.168.99.100:6443"
[discovery] Created cluster-info discovery client, requesting info from "https://192.168.99.100:6443"
[discovery] Created cluster-info discovery client, requesting info from "https://192.168.99.100:6443"
[discovery] Requesting info from "https://192.168.99.100:6443" again to validate TLS against the pinned public key
[discovery] Cluster info signature and contents are valid and TLS certificate validates against pinned roots, will use API Server "192.168.99.100:6443"
[discovery] Successfully established connection with API Server "192.168.99.100:6443"

This node has joined the cluster:
* Certificate signing request was sent to master and a response
was received.
* The Kubelet was informed of the new secure connection details.

Run 'kubectl get nodes' on the master to see this node join the cluster.
/vagrant/scripts/kubeadm-setup-worker.sh: Worker node ready
[root@worker1 ~]# exit
logout
[vagrant@worker1 ~]$ exit
logout
Connection to 127.0.0.1 closed.
$
Once the setup has completed go ahead, exit out of the VM and execute the steps for worker2:
$ vagrant up worker2
Bringing machine 'worker2' up with 'virtualbox' provider...
==> worker2: Importing base box 'ol7-latest'...
==> worker2: Matching MAC address for NAT networking...
==> worker2: Setting the name of the VM: Kubernetes_worker2_1521843186488_78983
==> worker2: Fixed port collision for 22 => 2222. Now on port 2201.
==> worker2: Clearing any previously set network interfaces...
==> worker2: Preparing network interfaces based on configuration...
worker2: Adapter 1: nat
worker2: Adapter 2: hostonly
==> worker2: Forwarding ports...
worker2: 22 (guest) => 2201 (host) (adapter 1)
==> worker2: Running 'pre-boot' VM customizations...
==> worker2: Booting VM...
==> worker2: Waiting for machine to boot. This may take a few minutes...
worker2: SSH address: 127.0.0.1:2201
...
...
...
worker2: Installed:
worker2: kubeadm.x86_64 0:1.9.1-2.0.2.el7
worker2:
worker2: Dependency Installed:
worker2: kubectl.x86_64 0:1.9.1-2.0.2.el7
worker2: kubelet.x86_64 0:1.9.1-2.0.2.el7
worker2: kubernetes-cni.x86_64 0:0.6.0-2.0.1.el7
worker2: kubernetes-cni-plugins.x86_64 0:0.6.0-2.0.1.el7
worker2: socat.x86_64 0:1.7.3.2-2.el7
worker2: Complete!
worker2: net.bridge.bridge-nf-call-ip6tables = 1
worker2: net.bridge.bridge-nf-call-iptables = 1
worker2: Your Kubernetes VM is ready to use!
==> worker2: Configuring proxy for Docker...
$
$ vagrant ssh worker2

Welcome to Oracle Linux Server release 7.4 (GNU/Linux 4.1.12-112.14.13.el7uek.x86_64)

The Oracle Linux End-User License Agreement can be viewed here:

* /usr/share/eula/eula.en_US

For additional packages, updates, documentation and community help, see:

* http://yum.oracle.com/

[vagrant@worker2 ~]$ su -
[root@worker2 ~]# /vagrant/scripts/kubeadm-setup-worker.sh
/vagrant/scripts/kubeadm-setup-worker.sh: Login to container registry
Username: gerald[dot]venzl[at]oracle[dot]com
Password:
Login Succeeded
/vagrant/scripts/kubeadm-setup-worker.sh: Setup Worker node
Starting to initialize worker node ...
Checking if env is ready ...
Checking whether docker can pull busybox image ...
Checking access to container-registry.oracle.com/kubernetes ...

v1.9.1: Pulling from kubernetes/kube-proxy-amd64
Digest: sha256:852fbdc6be8b357356c047bd9649e1c62f572c0e61a0526cd048c0d0dc675e4d
Status: Image is up to date for container-registry.oracle.com/kubernetes/kube-proxy-amd64:v1.9.1
Checking whether docker can run container ...
Checking iptables default rule ...
Checking br_netfilter module ...
Checking sysctl variables ...
Enabling kubelet ...
Created symlink from /etc/systemd/system/multi-user.target.wants/kubelet.service to /etc/systemd/system/kubelet.service.
Check successful, ready to run 'join' command ...
[preflight] Running pre-flight checks.
[validation] WARNING: kubeadm doesn't fully support multiple API Servers yet
[discovery] Trying to connect to API Server "192.168.99.100:6443"
[discovery] Created cluster-info discovery client, requesting info from "https://192.168.99.100:6443"
[discovery] Trying to connect to API Server "192.168.99.100:6443"
[discovery] Created cluster-info discovery client, requesting info from "https://192.168.99.100:6443"
[discovery] Requesting info from "https://192.168.99.100:6443" again to validate TLS against the pinned public key
[discovery] Cluster info signature and contents are valid and TLS certificate validates against pinned roots, will use API Server "192.168.99.100:6443"
[discovery] Successfully established connection with API Server "192.168.99.100:6443"

This node has joined the cluster:
* Certificate signing request was sent to master and a response
was received.
* The Kubelet was informed of the new secure connection details.

Run 'kubectl get nodes' on the master to see this node join the cluster.
/vagrant/scripts/kubeadm-setup-worker.sh: Worker node ready
[root@worker2 ~]# exit
logout
[vagrant@worker2 ~]$ exit
logout
Connection to 127.0.0.1 closed.
$
Verifying the Kubernetes cluster
Once the worker1 and worker2 VMs are up and running you are good to go! You can verify the cluster by ssh’ing into the master node and use one or more of the following commands. Note: After the setup these commands have to be executed as the vagrant user, which is the owner of the Kubernetes installation:
- kubectl cluster-info
- kubectl get nodes
- kubectl get pods –namespace=kube-system
$ vagrant ssh master
Last login: Fri Mar 23 21:53:41 2018 from 10.0.2.2

Welcome to Oracle Linux Server release 7.4 (GNU/Linux 4.1.12-112.14.13.el7uek.x86_64)

The Oracle Linux End-User License Agreement can be viewed here:

* /usr/share/eula/eula.en_US

For additional packages, updates, documentation and community help, see:

* http://yum.oracle.com/

[vagrant@master ~]$ kubectl cluster-info
Kubernetes master is running at https://192.168.99.100:6443
KubeDNS is running at https://192.168.99.100:6443/api/v1/namespaces/kube-system/services/kube-dns:dns/proxy

To further debug and diagnose cluster problems, use 'kubectl cluster-info dump'.

[vagrant@master ~]$ kubectl get nodes
NAME                STATUS  ROLES    AGE    VERSION
master.vagrant.vm   Ready   master   24m    v1.9.1+2.0.2.el7
worker1.vagrant.vm  Ready   <none>   13m    v1.9.1+2.0.2.el7
worker2.vagrant.vm  Ready   <none>   5m     v1.9.1+2.0.2.el7

[vagrant@master ~]$ kubectl get pods --namespace=kube-system
NAME                                      READY  STATUS   RESTARTS AGE
etcd-master.vagrant.vm                    1/1    Running  0        24m
kube-apiserver-master.vagrant.vm          1/1    Running  0        23m
kube-controller-manager-master.vagrant.vm 1/1    Running  0        24m
kube-dns-855949bbf-cwsgc                  3/3    Running  0        24m
kube-flannel-ds-f56w9                     1/1    Running  0        5m
kube-flannel-ds-flpql                     1/1    Running  0        13m
kube-flannel-ds-fxp9z                     1/1    Running  0        24m
kube-proxy-5thk9                          1/1    Running  0        5m
kube-proxy-jmswg                          1/1    Running  0        13m
kube-proxy-lfg9v                          1/1    Running  0        24m
kube-scheduler-master.vagrant.vm          1/1    Running  0        24m
kubernetes-dashboard-7c966ddf6d-hp7br     1/1    Running  0        24m
[vagrant@master ~]$ exit
logout
Connection to 127.0.0.1 closed.
$
Customizing your Kubernetes cluster on VirtualBox
The Vagrant files allow for a couple of customizations, such as:
NB_WORKERS(default:2): the number of worker nodes to provision.USE_PREVIEW(default:true): whentrue, Vagrant provisioning script will use the Oracle Linux 7 Preview and Add-ons channels for both Docker Engine and Kubernetes (latest version is select byyum).
Otherwhise it will only use the Add-ons channel.MANAGE_FROM_HOST(default:false): whentrue, Vagrant will bind port6443from the master node to the host. This allows you to manage the cluster from the host itself using the generatedadmin.conffile (assumingkubectlis installed on the host).BIND_PROXY(default:true): whentrue, Vagrant will bind the Kubernetes Proxy port from the master node to the host. Useful to access the Dashboard or any other application from outside the cluster. It is an easier alternative to ssh tunnel.MEMORY(default: 2048): all VMs are provisioned with 2GB memory. This can be slightly reduced if memory is a concern.
You can find those within your Vagrantfile and amend them to your needs.
Also check out the Oracle Container Services for use with Kubernetes User’s Guide for more information.
Hi Gerald,
Thank you for this guide. I followed this guide and installed 3 nodes k8s cluster. However I found there is something wrong with network between pods
[vagrant@master vagrant]$ kubectl get po -o wide -n kube-system
NAME READY STATUS RESTARTS AGE IP NODE
etcd-master.vagrant.vm 1/1 Running 3 2d 192.168.99.100 master.vagrant.vm
kube-apiserver-master.vagrant.vm 1/1 Running 7 2d 192.168.99.100 master.vagrant.vm
kube-controller-manager-master.vagrant.vm 1/1 Running 3 2d 192.168.99.100 master.vagrant.vm
kube-dns-855949bbf-d4cj2 3/3 Running 6 2d 10.244.0.6 master.vagrant.vm
kube-flannel-ds-cmq2z 1/1 Running 1 2d 192.168.99.101 worker1.vagrant.vm
kube-flannel-ds-h87pm 1/1 Running 3 2d 192.168.99.100 master.vagrant.vm
kube-flannel-ds-ssdcw 1/1 Running 1 2d 192.168.99.102 worker2.vagrant.vm
kube-proxy-c97rv 1/1 Running 2 2d 192.168.99.100 master.vagrant.vm
kube-proxy-fd9c8 1/1 Running 1 2d 192.168.99.102 worker2.vagrant.vm
kube-proxy-w5ggl 1/1 Running 1 2d 192.168.99.101 worker1.vagrant.vm
kube-scheduler-master.vagrant.vm 1/1 Running 3 2d 192.168.99.100 master.vagrant.vm
kubernetes-dashboard-7c966ddf6d-dzwf7 1/1 Running 3 2d 10.244.0.7 master.vagrant.vm
tiller-deploy-75f5797b-5ps8s 1/1 Running 0 46m 10.244.1.2 worker1.vagrant.vm
[vagrant@master vagrant]$ ping 10.244.1.2
PING 10.244.1.2 (10.244.1.2) 56(84) bytes of data.
^C
— 10.244.1.2 ping statistics —
56 packets transmitted, 0 received, 100% packet loss, time 55097ms
Did you encounter this issue?
Thanks,
Junyi.
Hi Junyi,
I cannot reproduce your issue. I have posted your comment over on the GitHub repo as a new issue. Please follow up over there going forward: https://github.com/oracle/vagrant-boxes/issues/38
Thx,
Gerald
Just an FYI, i’m running through this in June 2018 and some stuff has changed. For instance, I had to edit my config because basic unix commands weren’t being recognized due to “bad interpreter”. A quick glance at https://stackoverflow.com/questions/2920416/configure-bin-shm-bad-interpreter and I could continue the rest of this doc fine. Anyone else run into this?
Thanks Josh!
The files do change indeed on a regular basis to provide more and/or new functionality. Best is to open a GitHub issue in the repository so that the maintainer(s) and community can help you further.
Thx,
I will confirm it happens in multiple env’s and do so! Also, is this installation pre-configured to token auth w/ Dashboard? Ive been using the tokens for “kubernetes-dashboard” service acccount and it always tells me its wrong. I know i’m missing something somewhere. Any help is appreciated!
Again, best is to open a GitHub issue and as the question over there so that the maintainers and community can help you further!
Hello,
First of all thank you so much for fantastic post. After lots of sweat and tears, I managed to configure the cluster with one master and one worker. I dont know why the second worker wouldnt work.
When I tried vagrant up worker2, I got the following error.
javier@ubuntu:~/vagrant-boxes/Kubernetes$ vagrant up worker2
Bringing machine ‘worker2’ up with ‘virtualbox’ provider…
==> worker2: Importing base box ‘ol7-latest’…
==> worker2: Matching MAC address for NAT networking…
==> worker2: Setting the name of the VM: Kubernetes_worker2_1534086943280_56168
==> worker2: Fixed port collision for 22 => 2222. Now on port 2201.
==> worker2: Clearing any previously set network interfaces…
==> worker2: Preparing network interfaces based on configuration…
worker2: Adapter 1: nat
worker2: Adapter 2: hostonly
==> worker2: Forwarding ports…
worker2: 22 (guest) => 2201 (host) (adapter 1)
==> worker2: Running ‘pre-boot’ VM customizations…
==> worker2: Booting VM…
==> worker2: Waiting for machine to boot. This may take a few minutes…
worker2: SSH address: 127.0.0.1:2201
worker2: SSH username: vagrant
worker2: SSH auth method: private key
Timed out while waiting for the machine to boot. This means that
Vagrant was unable to communicate with the guest machine within
the configured (“config.vm.boot_timeout” value) time period.
If you look above, you should be able to see the error(s) that
Vagrant had when attempting to connect to the machine. These errors
are usually good hints as to what may be wrong.
If you’re using a custom box, make sure that networking is properly
working and you’re able to connect to the machine. It is a common
problem that networking isn’t setup properly in these boxes.
Verify that authentication configurations are also setup properly,
as well.
If the box appears to be booting properly, you may want to increase
the timeout (“config.vm.boot_timeout”) value.
The last 3 paragraphs were in red font. So I tried again and this time aparently it worked, but then when I try vagrant ssh worker2 it logs into vagrant@localhost and from there I can not manage to connect to run the last script in worker2.
So do you have any idea what could be wrong?
Other than that the cluster of 1 master and worker1 seems to be fine.
And last but not least, I am running the whole thing within a VM where I create the cluster. So memory is a concern and i was wondering if I can leave the master with 2GB and the workers with 1Gb each and how will you do that. Do you need to vagrant each of the nodes? and do you know how could i modify the vagrant file so that it assigns different ammount of memory in different cases.
Thanks in advance and congratulations for phenomenal tutorial.
Hi Javier,
Your issue is here:
==> worker2: Booting VM…
==> worker2: Waiting for machine to boot. This may take a few minutes…
worker2: SSH address: 127.0.0.1:2201
worker2: SSH username: vagrant
worker2: SSH auth method: private key
Timed out while waiting for the machine to boot. This means that
Vagrant was unable to communicate with the guest machine within
the configured (“config.vm.boot_timeout” value) time period.
Specifically the “Timed out while waiting for the machine to boot.” which means that your VM, for whatever reason, didn’t boot. You will have to find out why it couldn’t come up, try looking at the logs of VirtualBox.
As to the memory requirements, you can change them in the Vagrantfile: https://github.com/oracle/vagrant-boxes/blob/master/Kubernetes/Vagrantfile#L61
However, note that I never tried it with just 1GB.
Also feel free to post your findings as a GitHub issue on the repository where the author of these scripts can provide further help. But first, you need to find out why the VM didn’t boot? Was it perhaps because there isn’t enough memory available?
Thx,
Thank you for the great job.
I’ve a couple of questions.
1) I’m trying to figure out how to access a service deployed on WLS running inside the k8s cluster.
2) After the initial provisioning on the VMs, it’s possible to add more workers?
Hi brx75!
Thank you very much!
You can add more workers by repeating the same steps as with the first two:
Run “vagrant up workerN; vagrant ssh workerN;” depending on how many workers you want.
For each of them run as root inside the VM: “/vagrant/scripts/kubeadm-setup-worker.sh”
Unfortunately I do not have the answer regarding WLS inside the Kubernetes cluster.
Best would be to ask question at https://github.com/oracle/vagrant-boxes/issues where the community can help you further.
Thx,
Hello,
This idea is great. But I failed in deploy it.
I have this type of error on the master.
“/vagrant/scripts/kubeadm-setup-master.sh: kubeadm-setup.sh did not complete successfully”
in the log file, I have this :
“./kubeadm-setup-master.sh: line 60: kubeadm-setup.sh: command not found”
Hi buzz,
Please log a ticket on GitHub (https://github.com/oracle/vagrant-boxes/issues) with the output of the scripts.
Thx,
Dear Sirs, please help here . I am getting below error when using vagrant up master
Thanks in advance
D:\TEMP\vagrant-boxes-master\Kubernetes>vagrant up master
Bringing machine ‘master’ up with ‘virtualbox’ provider…
==> master: Box ‘ol7-latest’ could not be found. Attempting to find and install…
master: Box Provider: virtualbox
master: Box Version: >= 0
==> master: Box file was not detected as metadata. Adding it directly…
==> master: Adding box ‘ol7-latest’ (v0) for provider: virtualbox
master: Downloading: https://yum.oracle.com/boxes/oraclelinux/latest/ol7-latest.box
master: Progress: 0% (Rate: 0*/s, Estimated time remaining: –:–:–)
An error occurred while downloading the remote file. The error
message, if any, is reproduced below. Please fix this error and try
again.
Failed to connect to yum.oracle.com port 443: Timed out
Hi karunakar,
Your internet connection timed out when contacting yum.oracle.com:
master: Downloading: https://yum.oracle.com/boxes/oraclelinux/latest/ol7-latest.box
master: Progress: 0% (Rate: 0*/s, Estimated time remaining: –:–:–)
An error occurred while downloading the remote file. The error
message, if any, is reproduced below. Please fix this error and try
again.
Failed to connect to yum.oracle.com port 443: Timed out
Please make sure you have internet connectivity.
Also, it’s always best to open a ticket on GitHub directly: https://github.com/oracle/vagrant-boxes/issues
Thx,
Hi Gerald,
Did Oracle stop supporting Kubernetes upgrades to this VBox cluster solution? Can’t upgrade to kubeadm 1.10 or higher from the 1.9.11 Oracle version, any thoughts on how to upgrade even if unsupported?
Thanks!
Kevin
Hi Kevin,
To be honest, I don’t know. Best would be to open an issue on GitHub with your question/issue at https://github.com/oracle/vagrant-boxes/issues
Thx,
Thanks for the reply, Gerald, much apprieciated.
Kevin